


Discover Glass with Etching: A Beginner's Guide
发布时间:
2025-08-05 15:23
来源:
Huize Glass
Key Highlights
- Glass etching is an accessible, creative DIY craft that adds permanent, frosted designs to your glassware.
- Etching cream, stencils, and protective gear are essential for achieving crisp, professional results at home.
- Beginners can use a Cricut machine or pre-made stencils for personalized etched glass projects.
- Proper preparation and cleaning of the glass surface are crucial to avoid mistakes and ensure the best results.
- Safety measures, like wearing gloves and working in a ventilated area, are a must when handling chemicals.
- This guide offers step-by-step instructions, beginner-friendly tips, and inspiring project ideas for your first time etching glass.
Introduction
Creating beautiful, personalized glass pieces through the art of etching can be both fun and rewarding. This guide will walk you through the basics of glass etching, including the essential tools, techniques, and safety precautions necessary for a successful project. Whether you're looking to add a unique touch to your home décor or craft meaningful gifts for occasions like Father's Day, understanding how to work with various glass surfaces will set the stage for your creative journey. Get ready to unleash your artistic potential!
Understanding Glass Etching: Basics and Benefits
Glass etching transforms ordinary glass into a work of art, creating intricate designs that enhance aesthetic appeal. This technique offers numerous benefits, such as personalizing glassware for special occasions like Father's Day or crafting unique gifts. With options ranging from etching cream to mechanical methods, it's accessible for all skill levels. Not only does this craft improve fine motor skills through careful application of stencils and tools, but it also fosters creativity, enabling you to bring your visions to life on any glass surface.
What is Glass Etching?
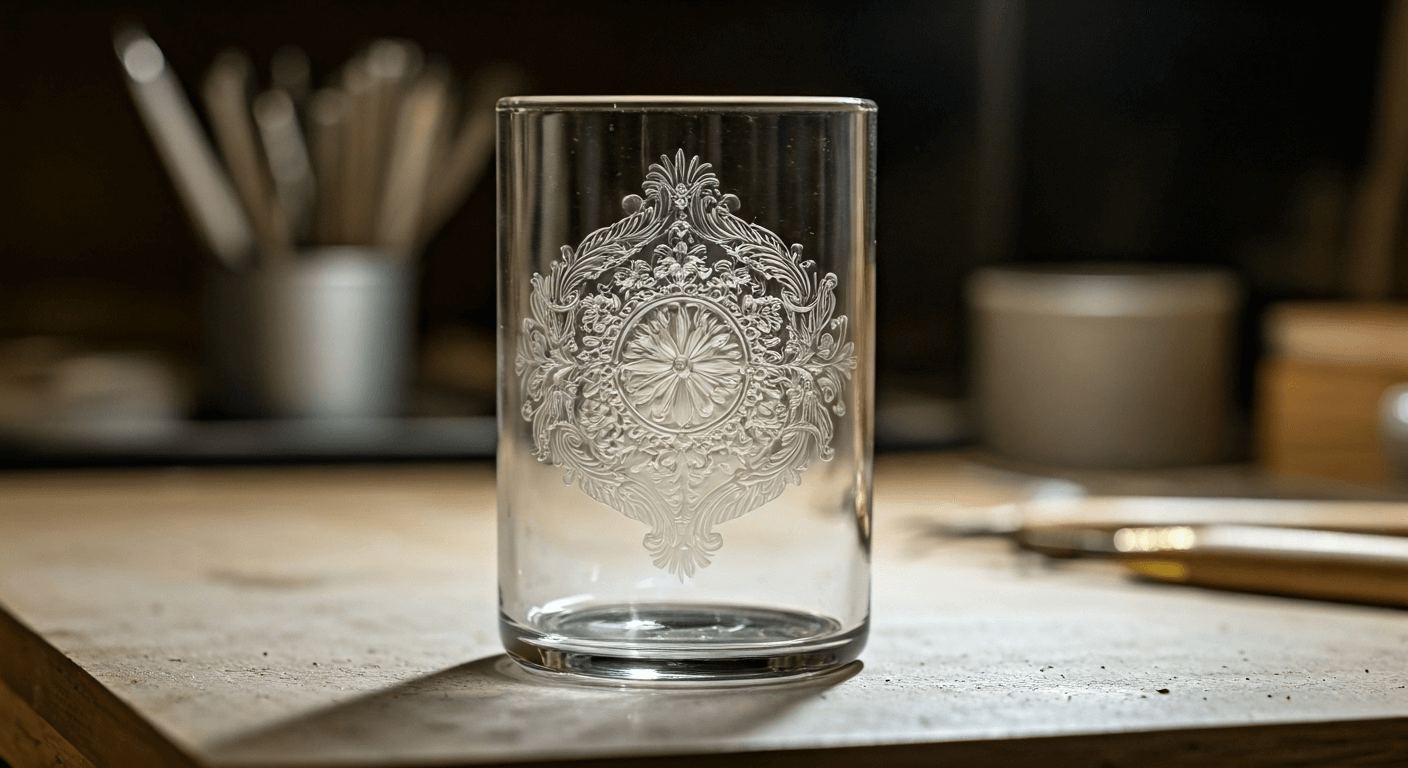
Glass etching is a decorative technique that uses chemical or mechanical processes to create designs on glass surfaces. This process results in a frosted appearance, allowing for personalized artwork on various glass items, enhancing both aesthetics and functionality in home decor or gifts.
Popular Uses for Etched Glass
Etched glass serves various practical and decorative functions that enhance both aesthetic and usability aspects. Commonly found in homes and businesses, it adorns items like wine glasses, vases, and mirrors, adding a touch of elegance. Businesses often use glass etching for branding purposes, creating customized logos on storefront windows or signage. Additionally, many people turn to DIY glass etching for personalized gifts on special occasions such as Father's Day, making it a heartfelt choice for showcasing unique designs and monograms.
Types of Glass and Etching Methods
Selecting the right type of glass can significantly influence the outcome of your projects. Basic options include Pyrex for its durability or plain glassware like wine glasses and vases for more decorative work. Various etching methods—including chemical, mechanical, or laser techniques—also affect the final look. While chemical methods, like using Armour Etch, provide a deep etch, laser etching offers precision for intricate designs. Understanding these elements ensures your first time etching culminates into visually stunning, durable results.
Best Glass Types for Etching Projects
Choosing the right glass type is crucial for successful etching projects. Clear glassware such as wine glasses, vases, and pyrex dishes often yield the best results due to their smooth surfaces. This allows etching cream or laser techniques to create precise, clean designs. Opt for thicker glass options to reduce the risk of breakage and achieve a more durable etched surface. Additionally, using materials from craft stores can offer a variety of textures and styles, enhancing your DIY glass etching experience.
Overview of Chemical, Mechanical, and Laser Etching Techniques
Chemical etching involves applying a corrosive gel like etching cream to the glass surface, which reacts to create intricate designs. This method is favored for its simplicity and effectiveness, especially for beginners. Mechanical etching utilizes tools such as a rotary tool or engraving bit, offering control for detailed work but demanding a steady hand. Laser etching, on the other hand, employs focused light to vaporize material, resulting in clean, precise engravings. Each technique provides unique textures and finishes suitable for various artistic projects.
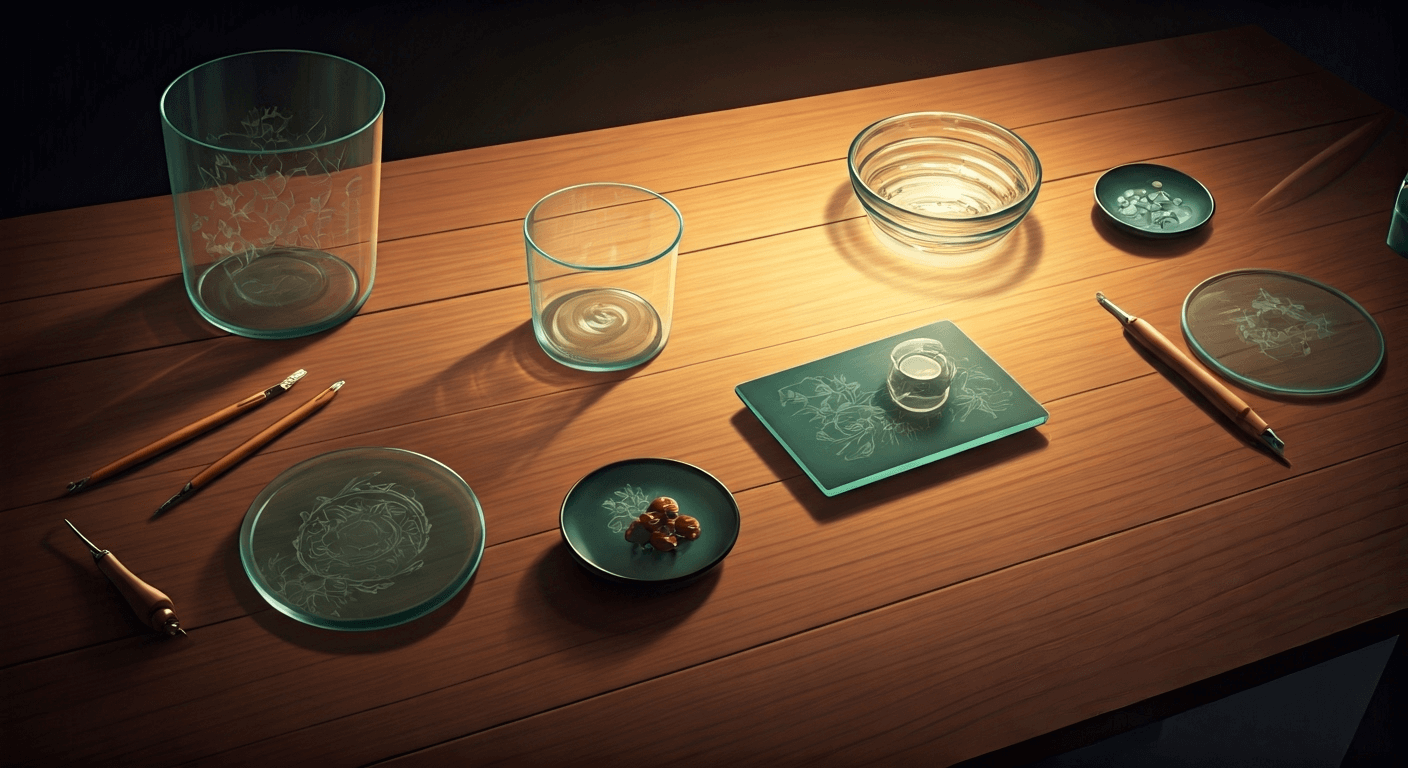
Essential Tools and Materials for Getting Started
Glass etching requires a few essential tools and materials to achieve impressive results. Start with etching cream, such as Armour Etch, along with protective gear like plastic gloves. Stencils can be made using contact paper or stencil vinyl, while painter's tape and transfer tape help secure your designs on the glass surface. A cutting machine, like a Cricut or Silhouette, will streamline the creation of intricate stencil patterns. For applying etching cream smoothly, a paint brush or popsicle stick is ideal.
Must-Have Supplies for Home Glass Etching
A successful home glass etching project requires a few essential supplies. Start with etching cream, like Armour Etch, for creating your intricate designs. Contact paper or stencil vinyl serves as the foundation for your stencil, while painter’s tape secures any edges. Tools such as an Exacto knife or scissors are vital for precise cutting. Don’t forget protective gear like plastic gloves and a well-ventilated work area to ensure safety. Keeping glass cleaner and paper towels handy will help maintain a tidy workspace post-etching.
Choosing Between Ready-Made and DIY Stencils
Selecting between ready-made and DIY stencils involves weighing convenience against personalization. Ready-made stencils, often found at craft stores like Hobby Lobby or Joann, offer ease and consistency, making them ideal for first-time projects. In contrast, DIY stencils allow for creativity, enabling you to customize designs using your preferred fonts and shapes. Using a cutting machine like a Cricut can streamline this process, producing intricate designs tailored to your vision. Ultimately, the choice hinges on your project's needs and your artistic aspirations.
Safety Precautions for Glass Etching at Home
Ensuring a safe environment is crucial for successful glass etching. Begin by wearing protective gear, such as plastic gloves and safety goggles, to safeguard against potential splashes from etching cream. Organizing your work area helps minimize risks; use a sturdy table and keep tools like the Exacto knife or scissors out of reach of children. Adequate ventilation is key, particularly when working with chemical etching products. Always have a first aid kit nearby, just in case. Maintaining these precautions leads to a more enjoyable experience.
Handling Chemicals and Sharp Tools Safely
Safety is paramount when dealing with etching cream and sharp tools. Always wear protective gear, including plastic gloves and safety goggles, to prevent chemical burns and splashes. Keep your work area tidy and well-ventilated, especially when using products like Armour Etch. When handling tools such as an X-Acto knife or scissors, ensure they are stored securely after use. Employ painter’s tape to secure glass surfaces, minimizing the risk of accidents while working on intricate designs. Maintaining caution will lead to a successful DIY glass etching experience.
Setting Up a Safe and Clean Workspace
Creating an organized workspace is crucial for successful glass etching. Begin by decluttering your table, ensuring that all tools—like etching cream, a paintbrush, and your cutting machine—are within reach. Using protective gear, such as plastic gloves and a mask, provides safety against chemicals. Utilize painter’s tape to secure your glass while preventing air bubbles during the etching process. Lastly, have paper towels handy to immediately clean any spills, keeping your environment safe and tidy. This proactive approach fosters creativity and confidence in your projects.
Step-by-Step Beginner’s Guide to Etching Glass
Getting started with glass etching can be an enjoyable venture for beginners. Begin by thoroughly cleaning your glass surface with a glass cleaner to ensure a clear and smooth application. Next, carefully apply your stencil using masking tape, ensuring it's securely attached to prevent air bubbles. Once positioned, apply a thick layer of etching cream, following the instructions for the best results. Finally, after rinsing the cream off, gently remove the stencil to unveil your beautiful etched design.
Step 1: Cleaning and Prepping the Glass Surface
Start by thoroughly cleaning the glass surface to remove any dust or fingerprints. Use a glass cleaner and a paper towel for a spotless finish, ensuring the surface is prepared for etching. If necessary, apply painter’s tape around the edges to protect them. For intricate designs, a precise approach is vital; consider using an exacto knife to trim away any excess contact paper. It's essential to work in a clean, well-lit area to achieve the best results for your etching project.
Step 2: Applying and Securing Your Stencil
Securing the stencil properly is crucial for achieving clean, crisp designs on your glass. Begin by cutting your stencil from contact paper or stencil vinyl, ensuring it's slightly larger than the intended design. Use painter's tape to attach the stencil firmly to the glass surface, avoiding any air bubbles that could distort the etching. For larger areas, additional masking tape may be necessary for stability. This meticulous preparation will yield better results and prevent any unintended markings during the etching process.
Step 3: Using Etching Cream or Alternative Methods
Applying etching cream is a straightforward way to achieve beautifully etched designs on your glass. After securing your stencil with painter’s tape, use a paintbrush to apply a thick layer of the cream, ensuring complete coverage. For alternative methods, consider using a cricut machine or a cutting machine to cut out intricate stencil designs from vinyl. This approach provides precision and can simplify the etching process for larger areas like vases or wine glasses. Follow the instructions on your chosen product for optimal results.
Step 4: Removing Stencil and Finishing Touches
Once the etching cream or alternative method has set for the recommended duration, carefully peel away the stencil. Use a slow, deliberate motion to avoid damaging the etched surface, ensuring any excess etching cream does not smear. Rinse the glass with water and pat dry with a paper towel to reveal the crisp design. For a polished look, consider applying a glass cleaner to enhance the shine. Avoid touching the surface with bare hands to preserve your artwork.
Using a Cricut Machine for Custom Glass Etching
Creating custom glass designs using a Cricut machine opens up a world of creative possibilities. With the design space software, you can easily transform your ideas into stencils, allowing for intricate patterns on the glass surface. Choosing the right adhesive contact paper or stencil vinyl is essential for ensuring a smooth application. Once you've cut your design, apply it carefully using transfer tape to avoid air bubbles. The precision of a cutting machine offers the best results for both beginner projects and advanced designs.
Designing and Cutting Stencils with Cricut
Creating stencils with a Cricut machine opens up endless possibilities for glass etching projects. Begin by selecting a design that suits your vision, using either pre-installed fonts or uploading your own graphics via Design Space. Remember to use stencil vinyl or contact paper for best results, ensuring a secure application on the glass surface. Once your design is cut, carefully weed out the excess vinyl using an exacto knife or scissors. This technique provides precision, allowing for clean and professional-looking etched surfaces.
Applying Cricut Stencils for Clean Etching Lines
Achieving sharp, clean lines when etching glass is possible with the right application of Cricut stencils. Start by carefully positioning the stencil on the glass surface, using masking tape to secure it. Ensure there are no air bubbles trapped beneath the vinyl, as these can lead to uneven etching. Use a paintbrush or an exacto knife to apply a thick layer of etching cream. After the prescribed time, rinse away the cream for a beautifully etched surface.
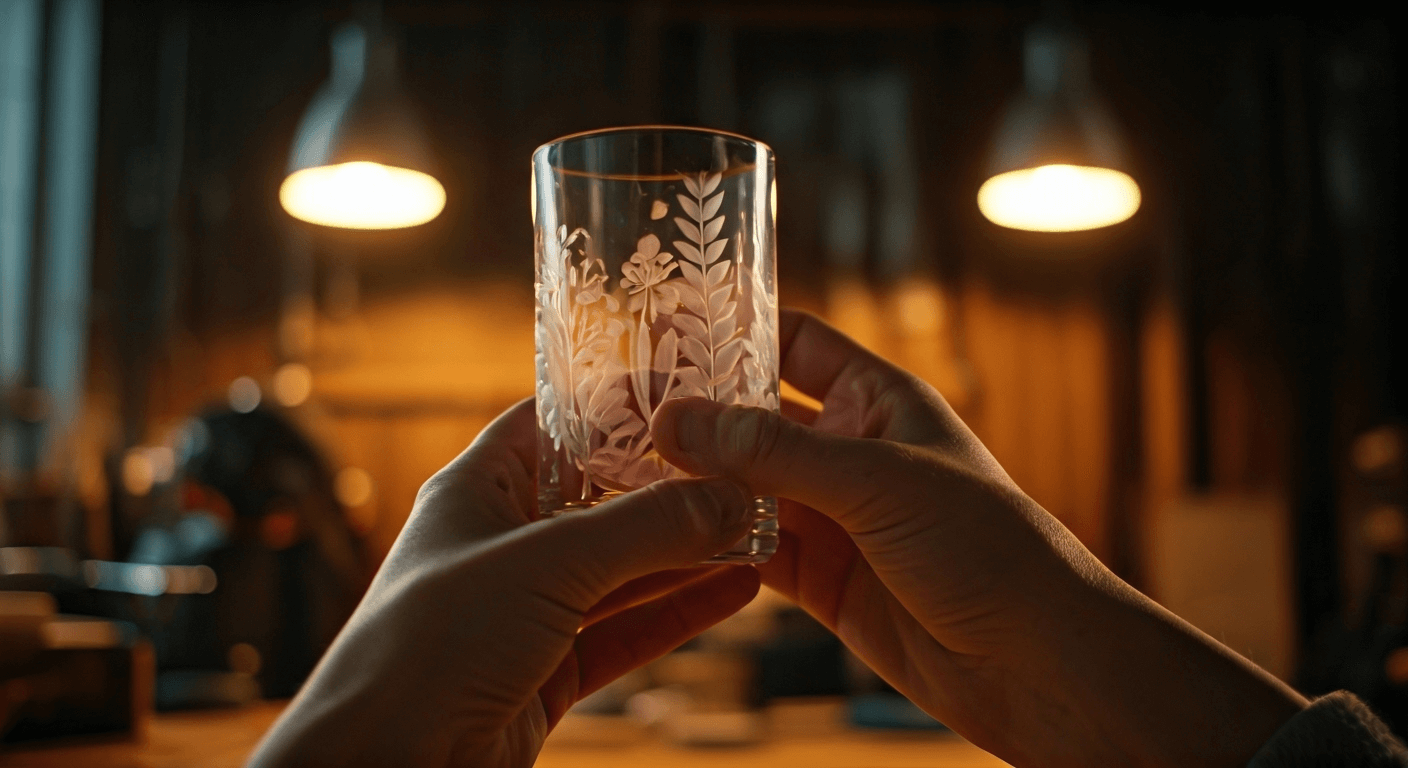
Creative Project Ideas and Inspiration for Beginners
Transforming plain glassware into stunning pieces can be a rewarding endeavor. Consider etching personalized wine glasses featuring monograms for memorable gifts, especially for occasions like Father’s Day. Decorative vases or simple glass jars adorned with intricate designs using contact paper or stencil vinyl can elevate any home decor. For a fun project, try creating seasonal designs on glass ornaments or upcycle dollar tree finds into unique serving dishes. The possibilities are endless, making etched glass an ideal canvas for creativity!
Etched Glassware Gift Ideas
Creative etched glassware gifts can add a personal touch to any occasion. Consider customizing wine glasses with monograms or inspiring quotes, perfect for weddings or Father’s Day. Decorative vases etched with intricate designs can serve as stunning centerpieces for home decor. For a thoughtful gift, create a matching set of pint glasses featuring unique graphics. Utilize your Cricut machine for precise stencils, ensuring clean lines and a professional finish. These personalized pieces can be cherished for years, making them memorable keepsakes.
Decorative Home Projects to Try
Creating stunning decorations for your home using etched glass can be a rewarding venture. Consider designing personalized wine glasses or vases embellished with monograms, which can serve as heartfelt gifts for occasions like Father’s Day. Utilizing a cricut machine can streamline your stencil creation process, ensuring clean lines and intricate designs. Alternatively, use simple contact paper and painter's tape to craft beautiful etched mirrors or picture frames that add a unique touch to any room. Let your creativity flow!
Caring for and Maintaining Etched Glass
Proper care is essential for preserving the beauty of your etched glass pieces. Regularly clean the etched surface using a gentle glass cleaner and a soft paper towel to avoid scratching. Be cautious with abrasive materials that can diminish the design’s clarity. For etching projects like wine glasses or vases intended for frequent use, hand wash them instead of using a dishwasher. Protect the surface from fingerprints and dust by storing etched items in a safe, clean area.
Cleaning Tips to Preserve Designs
Maintaining the longevity of your etched designs requires careful cleaning techniques. Use a gentle glass cleaner and a soft cloth to avoid scratching the etched surface. Avoid abrasive sponges or harsh chemicals that may degrade the etching cream's effect over time. For more stubborn stains, dampen a paper towel with diluted cleaner and gently wipe the area, ensuring no air bubbles form during rinsing. Protective gear, like plastic gloves, can help keep fingerprints at bay, preserving the crisp appearance of your beautiful creations.
Common Mistakes and How to Avoid Them
A frequent pitfall in glass etching is improper surface preparation, which can lead to air bubbles and uneven designs. Always clean the glass surface thoroughly using glass cleaner and a paper towel to prevent fingerprints and dust. Over-applying etching cream may also cause blurring; a thick layer is unnecessary. Instead, use a paintbrush for precision. Lastly, forgetting protective gear can result in accidents; always wear plastic gloves. By heeding these tips, achieving better results becomes a much simpler task.
Conclusion
Exploring the world of glass etching opens up a realm of creativity and personalization that is rewarding for both beginners and seasoned crafters. With a variety of techniques, tools, and materials like etching cream and vinyl stencils, anyone can create stunning designs on glass surfaces. Whether you're seeking unique gift ideas or decorative home projects, the ability to etch glass allows for limitless possibilities. Dive into this craft, and let your imagination flourish as you transform plain glassware into bespoke treasures.
Frequently Asked Questions
How long should I leave etching cream on glass?
- For optimal results, leave etching cream on glass for 10 to 15 minutes, depending on the desired depth of etching. Always follow the manufacturer's instructions for best practices and check periodically to ensure you achieve the perfect finish.
Can any type of glass be safely etched?
- While most glass types can be etched, safety and results vary. Soda-lime glass is the easiest to etch, while tempered glass requires caution due to its strength. Always test on a small area first to ensure desired results without compromising safety.
What are the best ways to prevent stencil bleeding?
- To prevent stencil bleeding, ensure the glass surface is clean and dry. Use adhesive spray or painter's tape to secure edges, and apply etching cream evenly. Avoid over-saturating your stencil with cream, as this can lead to excess seepage. Test on scrap glass first for best results.
How do I fix mistakes in my etched glass design?
- To fix mistakes in your etched glass design, carefully sand the area using fine-grit sandpaper or a glass scraper to remove the unwanted etching. Afterward, clean the surface thoroughly before reapplying your stencil and etching cream for a fresh start.
Related News

DONGGUAN CITY HUIZE GLASS TECHNOLOGY CO., LTD.
CONTACT US
TEL:+86-769-38935799
ADD:No.18 Longbiling Longteng Road, Tangxia Town,
Dongguan City, Guangdong Province, China

WeChat Public